Source: Real Simple Magazine
28 oz can of whole peeled tomatoes
2 T olive oil
2 cloves of garlic chopped
1/2 lb rigatoni
1 red onion sliced (I chopped mine -- b/c I didn't read the directions carefully).
1 lb mixed mushrooms trimmed and sliced (I used baby portobella, shiitake and enochi mushrooms)
2 10 oz packages of spinach thawed and squeezed of excess liquid
15 oz container of ricotta
8 oz mozzarella cheese
Break up the tomatoes and their juices in a medium bowl with your hands. Be careful, with my first enthusiastic squeeze, I managed to squirt tomato juice all over myself, my daughter and the kitchen floor. Add the garlic, oil, 3/4 t salt and 1/2 t pepper. In a separate bowl (and pick a really nice big bowl), combine the uncooked rigatoni, onion and mushrooms.
Spread a third of the tomato mixture in the bottom of a 4 to 6 quart of slow cooker. Top with half of the pasta mixture, half the spinach, a third of the tomato mixture, half the ricotta and half the mozzarella. Repeat.
Cover and cook on high until the pasta is tender, 3.5 to 4 hours.
Serve sprinkled with parmesan cheese.
I picked this recipe b/c I love slow cooker recipes -- it is so nice to come home at the end of a long day to a house that smells delicious and it feels like someone spent all day making you dinner. They are also nice on a lazy Sunday like today, b/c it just feels so homey. It's great in the winter b/c you can make soups, stews etc. They are great in the summer b/c you don't have to slave over a hot stove or oven. They are great. Why, I ask myself, then, do I have one of those cheesy old slowcookers that have the designs on the outside and are tall and narrow? Why don't I have one of those sleek new steel models with the lids that lock in place? Why? I don't have the answer to that, other than I don't think about slow cookers other than on the few occasions that I use them. But there is a great gift idea should someone want to get me a birthday/Christmas present :)
I am having an attention deficit sort of day. I failed to follow the recipe in several respects. I completely messed up the layering sequence, for one. In the end, I just randomly put things in the crockpot. I also didn't realize until about 5 minutes after I turned it on, that I completely omitted the mozzarella cheese.
Another note on the recipe -- it makes a lot. I am not sure what size my crockpot is -- it's the standard old school slow cooker -- it is overstuffed with the amount of stuff this recipe makes. However, as you start cooking and the mushrooms shrink -- the space issue improves greatly.
OK, so no picture of this dish -- it is just not that pretty -- it's pasta and a bunch of stuff -- there was just no pretty way to dish it up. By the way, for serving, I put some of the mozzarella cheese I left out on top of my pasta.
This is a solid, hearty vegetarian dish -- perfect for a weeknight. I would recommend solid seasoning with salt and pepper as there are a lot of mellow flavors going on in the dish. And I would also highly recommend using a mixture of interesting mushrooms -- the texture of the mushrooms are key in this dish, and lets face it, button mushrooms don't have much of a texture or flavor. So splurge on some good mushrooms, your dish will thank you.
Sunday, April 28, 2013
Sunday, April 21, 2013
Cucumber and Radish Salad
Source: Bon Appetit Magazine
3/4 c sliced almonds -- toasted
1 small shallot finely chopped
1/4 c extra virgin olive oil
1/4 c red wine vinegar
salt and pepper
1.5 lb English cucumber cut into 1/2" pieces
1 bunch radishes, trimmed, cut into thin wedges
2 c flat leaf parsley leaves chopped
Whisk shallot, oil and vinegar in a large bowl. Season with salt and pepper. Add cucumbers, radishes, parsley and almonds, toss to coat. Season with salt and pepper.
It was high time I tried something healthy. Spring is coming, and I felt like we needed a fresh and vegetable based side dish.
Obviously, this is a very easy dish to make. I love cucumbers and radishes -- so I knew I would like this combo. Radishes are an early spring food for me. When I was little, it was very exciting when the little fresh radishes became available. My mom would slice them really thin, and it was delicious on sandwiches, or on a fresh roll with just butter and salt. These days, I like to dip them in sea salt and eat them. I enjoy the tender little radishes first out in the season, and this salad seemed like the perfect dish for that.
The salad is fresh, light, crunchy and delicious. The sliced almonds provide an unexpected and different texture in an otherwise crunch salad. All the main ingredients are up front and center -- so only make this if you like cucumbers, parsley and radishes. Also, be sure to use plenty of salt and pepper -- it really brings the flavors together.

Saturday, April 13, 2013
Roasted Pork Belly
Source: Bon Appetit Magazine
I skipped two weeks. I can assure you guys that I did try more than two recipes during that hiatus, but with Easter and everything else, things were just a little a hectic, so I didn't have time to blog, take pictures etc. And frankly, the recipes I tried weren't all that great. So no harm no foul -- hopefully no more hiatus either.
Now for the Roasted Pork Belly
3 lb pork belly, skin removed, fat intact
2 T fresh thyme
2 T sugar
2 T kosher salt
2 t black pepper
1 medium onion, sliced into 1/2 inch rings
1 c dry white wine
Using a sharp knife, score pork belly fat in a crosshatch pattern at about 3/4" intervals, taking care not to cut into the meat.
Mix thyme, sugar, salt and pepper in a small bowl. Rub thyme mixture on both sides of pork. place pork in a large resealable plastic bag, and seal bag, chill at least 8 hours and up to 1 day.
Preheat oven to 250. Arrange onion in bottom of large heavy pot with a lid. Rinse pork, and place fat side up on top of onion, add wine.

This is the pork right after you put it in the put -- not very appetizing, right?
Cover pot, place in oven and braise pork, basing occasionally, until fork-tender 2.5-3 hours. increase oven temperature to 400. Uncover pot, and cook until meat is very tender and fat is crisp and golden brown, about 1 hour longer.

This is the pork belly after a couple of hours of braising -- lots more liquid (fat?) -- and still not looking very good. I kept going b/c it smelled good, and b/c frankly, there was not much else to do.

 And, the finished product -- much better, right? And something you'd actually want to have for dinner.
So I picked this recipe b/c , well, I've heard about pork belly before, but never used it. It is supposed to be a delicacy (although not a lean protein, to say the least), used in Asian cuisine a lot. This recipe looked fairly simple (although time consuming), so I thought I'd give it a try.
I have read other people having problems sourcing the pork belly. People on line were suggestion Asian markets or grocery stores. I had no problem finding pork belly at Whole Foods -- $7 per pound. Not cheap, but also not terribly extravagant.
So pork belly is a very fatty cut of meat -- in fact, I think bacon comes from pork belly.
This was very easy to make. All it took was patience. And the smell of the pork, onion and wine in the oven while gently braising -- it was very pleasant.
The dish is good. Incredibly rich, salty -- but very tasty. With the time, health effects and cost involved -- I would probably not make this dish very often.
I skipped two weeks. I can assure you guys that I did try more than two recipes during that hiatus, but with Easter and everything else, things were just a little a hectic, so I didn't have time to blog, take pictures etc. And frankly, the recipes I tried weren't all that great. So no harm no foul -- hopefully no more hiatus either.
Now for the Roasted Pork Belly
3 lb pork belly, skin removed, fat intact
2 T fresh thyme
2 T sugar
2 T kosher salt
2 t black pepper
1 medium onion, sliced into 1/2 inch rings
1 c dry white wine
Using a sharp knife, score pork belly fat in a crosshatch pattern at about 3/4" intervals, taking care not to cut into the meat.
Mix thyme, sugar, salt and pepper in a small bowl. Rub thyme mixture on both sides of pork. place pork in a large resealable plastic bag, and seal bag, chill at least 8 hours and up to 1 day.
Preheat oven to 250. Arrange onion in bottom of large heavy pot with a lid. Rinse pork, and place fat side up on top of onion, add wine.

This is the pork right after you put it in the put -- not very appetizing, right?
Cover pot, place in oven and braise pork, basing occasionally, until fork-tender 2.5-3 hours. increase oven temperature to 400. Uncover pot, and cook until meat is very tender and fat is crisp and golden brown, about 1 hour longer.

This is the pork belly after a couple of hours of braising -- lots more liquid (fat?) -- and still not looking very good. I kept going b/c it smelled good, and b/c frankly, there was not much else to do.


So I picked this recipe b/c , well, I've heard about pork belly before, but never used it. It is supposed to be a delicacy (although not a lean protein, to say the least), used in Asian cuisine a lot. This recipe looked fairly simple (although time consuming), so I thought I'd give it a try.
I have read other people having problems sourcing the pork belly. People on line were suggestion Asian markets or grocery stores. I had no problem finding pork belly at Whole Foods -- $7 per pound. Not cheap, but also not terribly extravagant.
So pork belly is a very fatty cut of meat -- in fact, I think bacon comes from pork belly.
This was very easy to make. All it took was patience. And the smell of the pork, onion and wine in the oven while gently braising -- it was very pleasant.
The dish is good. Incredibly rich, salty -- but very tasty. With the time, health effects and cost involved -- I would probably not make this dish very often.
Sunday, March 24, 2013
Shiitake Mushroom and Potato Enchiladas
Source: Real Simple Magazine
1 oz dried shiitake mushrooms
2 T olive oil
1 white onion chopped
1 large russet potato --peeled and diced into quarter inch pieces
1 c frozen corn, thawed
2 c shredded cheese
14 oz can of green enchilada sauce
8 corn tortillas warmed
fresh cilantro for serving
Heat oven to 400 F. Combine the mushrooms and 2 c boiling water in a small bowl, and let sit until softened, 20 to 30 minutes. Remove the mushrooms and chop, reserve the soaking liquid.
Meanwhile, heat the oil in a large nonstick skillet over medium-high heat. Add the onion and potato and cook, tossing often, until the potato begins to soften, 6-8 minutes. Add the corn, 1 cup of the soaking liquid, 1/2 t salt and 1/4 t pepper. Reduce heat to medium, and cook, stirring often, until the potatoes are tender and most of the liquid is absorbed, 6-8 minutes. Transfer to a large bowl, and stir in 1 cup of the cheese.
Spread 1/2 c of the enchilada sauce in the bottom of a 9x13 inch baking dish. Dividing evenly, roll up the mushroom mixture in the tortillas and place seam-side down the the dish. Top with the remaining enchilada sauce and sprinkle with the remaining cheese. Bake until the sauce is bubbling and the cheese is melted, 12- 15 minutes. Sprinkle with the cilantro.
I chose this recipe, well, b/c it sounded really good.
This was a fairly easy recipe to make. There was some chopping involved, but that's par for the course. The filling took a bit longer to cook than the recipe indicated. Also, the green enchilada sauce came in a 10 ounce can -- so I used salsa verde to make up the 14 ounces. In fact, I probably used a little extra, b/c I only had a few spoonfuls left in the jar. Word to the wise - don't skip the step of warming up the tortillas -- they crack if you try to fold them up cold. After I filled the 8 tortillas as the recipe suggested, I had enough filling left over to fill 3-4 more (but I didn't have room left in the pan) -- so keep that in mind when planning.


 It's a delicious dish, and a slightly different twist on your standard Mexican fare. The shiitake are savory and very umami, while the corn adds little bursts of sweetness. The mellowness and earthiness of the filling is nicely balanced out the slight zing of the enchilada sauce. Delicious, highly recommend.
This was a fairly easy recipe to make. There was some chopping involved, but that's par for the course. The filling took a bit longer to cook than the recipe indicated. Also, the green enchilada sauce came in a 10 ounce can -- so I used salsa verde to make up the 14 ounces. In fact, I probably used a little extra, b/c I only had a few spoonfuls left in the jar. Word to the wise - don't skip the step of warming up the tortillas -- they crack if you try to fold them up cold. After I filled the 8 tortillas as the recipe suggested, I had enough filling left over to fill 3-4 more (but I didn't have room left in the pan) -- so keep that in mind when planning.


Sunday, March 17, 2013
Kwik Krumb Raisin Bars
Source: Pillsbury The Complete Book of Baking
Filling:
2.5 c raisins
1 c water
1 c applesauce
1 t lemon sauce
1.4 t cinnamon
Base and Topping:
2 c rolled oats
1 c flour
1/2 c sugar
1/2 c coconut
3/4 c butter
In a saucepan, bring raisins and water to a boil. Reduce heat and simmer for 15 minutes. Drain. Stir in applesauce, lemon juice and cinnamon. Set aside. Heat oven to 350. In a large bowl, combine oats, flour, sugar and coconut. Using a pastry blender or fork, cut in margarine until mixture resembles coarse crumbs. Reserve 2.5 c of crumb mixture for topping. Press remaining crumb mixture firmly in bottom of ungreased 13x9 inch pan. Spread evenly with filing. Sprinkle with reserved crumb mixture; press lightly. Bake at 350 for 30 to 40 minutes or until light golden brown. Cool completely. Cut into bars.
Another dessert. Shocking, I know. I am taking dinner tonight to some friends who recently had a baby. So naturally, I had to make a dessert. I thought this recipe looked versatile enough that after dessert tonight, they might have it from breakfast with coffee etc. Plus, today is just an absolutely yucky day -- cold, rainy, gray. Being that it's the middle of March, this might be the last really good day to make a "wintery" dessert. In addition, I had all the ingredients at home, so it was an easy decision. I did forget that one of my friends does not like coconut, so I really hope it won't come out very coconutty.
This was an easy dessert to make. And it had that warm, homey feel to it that I had hoped it would. The simmering raisins smelled great, and I love the smell or raisins and apples together. You have to bake it for a long time (and btw, mine took closer to 45 minutes to get golden brown) -- so everything gets nice and warm and smelling good.
The end result is delicious. Highly recommend. Even the coconut hater friend enjoyed it and had two pieces. So go ahead, try this!

Sunday, March 10, 2013
Chocolate Hazelnut Macarons
Source: Good Housekeeping Magazine
1 c. hazelnuts toasted
1 c. sugar (I reduced the sugar to 3/4 cup -- see below)
1/2 c unsweetened cocoa (I used special dark cocoa)
1 oz unsweetened chocolate chopped ( I used semi sweet chocolate)
1/2 t salt
2 egg whites
1 t vanilla extract
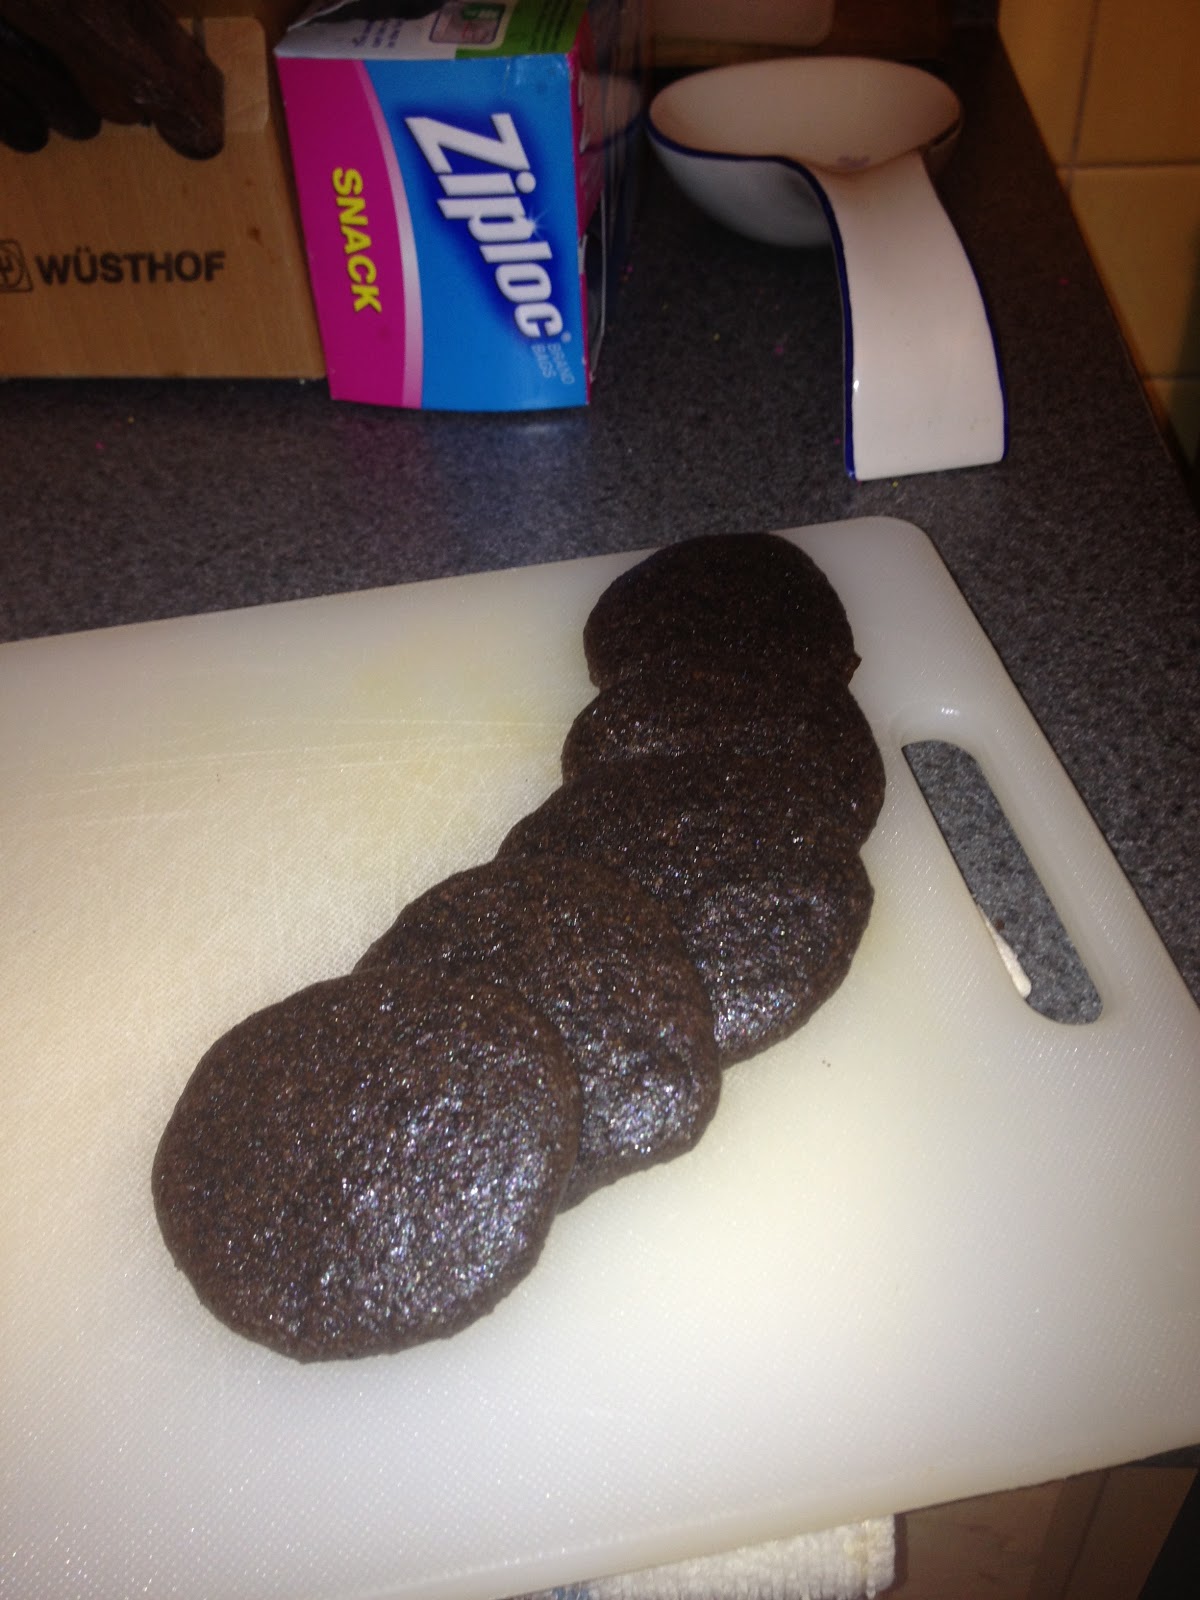
Preheat oven to 350 F. Line two large cookie sheets with parchment paper. In food processor with knife blade attached, pulse hazelnuts with sugar, cocoa, chocolate, and salt until ground. Because I didn't use unsweetened cocoa and chocolate and cocoa, I reduced the sugar to 3/4 cup. Also, instead of sugar and vanilla extract, I used my special homemade vanilla sugar. Add egg whites and vanilla, process until well blended. Mixture will be tacky. I would say it looks like mud.
Drop batter by rounded teaspoons, 2 inches apart on cookie sheets. Bake 10 minutes or until tops look dry. Cool completely on cookie sheet on wire rack.
First a little ingredient note -- hazelnuts. I grew up in Europe, where if you bake with nuts ... you are most likely using hazelnuts. It's by far the most common nut used in cooking and baking (and I am using the term "nut" loosely, without regard to its actual botanical designation). I grew up eating hazelnut pastries, cookies, chocolates, and I love hazelnuts. They are delicious. They are a little expensive, but nuts are generally not cheap, and it's well worth it. In the raw form, hazelnuts have a papery peel, kind of like peanuts and almonds. They taste delicious, crunchy and slightly grassy -- yeah, sounds weird, but true.
 However, the true flavor of hazelnuts really shines after you toast them. You can see hazelnuts in their raw form on the right, and toasted on the left. After you toast them on a cookie sheet, 350 F for 15 degrees, take the (admittedly hot) hazelnuts and rub the papery skin right off. In addition to the texture being more pleasant without the skin, the taste deepens, mellows ...and turns into that delicious and unmistakenly hazelnutty taste.
Moving on from the hazelnuts. Macarons -- the American version -- macaroons, is a dense, sweet coconut dessert. Very delicious. The French Macaron -- is a light cookie made with egg-whites and ground almonds, and some flavorings. Two cookies are usually sandwiched together with a variety of fillings to make an delicious, light and airy and not overly sweet concoction. I love macarons. Possibly my favorite dessert. They are crunchy, look gorgeous, come in a variety of flavors -- what's not to love. Always thought they were hard to make, so when I saw this recipe, and it looked pretty easy to make, without whipping a meringue, piping complicated shapes ..... well, I jumped at the chance to try it. The fact that there was chocolate involved didn't hurt matters either.
Very easy to make. You just throw a bunch of stuff in the food processor. Can I just tell you that when you open the food processor after pulsing everything together, the smell is heavenly -- chocolate and hazelnut is a fantastic combination (as the makers and lovers of Nutella well know). Makes sure you use parchment paper on your cookie sheet. As there is very little fat in these (only what's in the hazelnut) they will stick to the pan like no one's business.
 So these are not French macarons. At all. But they are very delicious cookies. They are light and crispy -- yet very rich from the dark chocolate and the hazelnuts. You think after you take the first bite -- wow, these are nothing, I can scarf down the whole pan in an hour. Yet after the second cookie, you are strangely full. Please don't let their pedestrian appearance fool you. These are delicate, dark and rich cookies. Not macarons, but a delectable treat nevertheless.
1 c. hazelnuts toasted
1 c. sugar (I reduced the sugar to 3/4 cup -- see below)
1/2 c unsweetened cocoa (I used special dark cocoa)
1 oz unsweetened chocolate chopped ( I used semi sweet chocolate)
1/2 t salt
2 egg whites
1 t vanilla extract
Preheat oven to 350 F. Line two large cookie sheets with parchment paper. In food processor with knife blade attached, pulse hazelnuts with sugar, cocoa, chocolate, and salt until ground. Because I didn't use unsweetened cocoa and chocolate and cocoa, I reduced the sugar to 3/4 cup. Also, instead of sugar and vanilla extract, I used my special homemade vanilla sugar. Add egg whites and vanilla, process until well blended. Mixture will be tacky. I would say it looks like mud.
Drop batter by rounded teaspoons, 2 inches apart on cookie sheets. Bake 10 minutes or until tops look dry. Cool completely on cookie sheet on wire rack.
First a little ingredient note -- hazelnuts. I grew up in Europe, where if you bake with nuts ... you are most likely using hazelnuts. It's by far the most common nut used in cooking and baking (and I am using the term "nut" loosely, without regard to its actual botanical designation). I grew up eating hazelnut pastries, cookies, chocolates, and I love hazelnuts. They are delicious. They are a little expensive, but nuts are generally not cheap, and it's well worth it. In the raw form, hazelnuts have a papery peel, kind of like peanuts and almonds. They taste delicious, crunchy and slightly grassy -- yeah, sounds weird, but true.

Moving on from the hazelnuts. Macarons -- the American version -- macaroons, is a dense, sweet coconut dessert. Very delicious. The French Macaron -- is a light cookie made with egg-whites and ground almonds, and some flavorings. Two cookies are usually sandwiched together with a variety of fillings to make an delicious, light and airy and not overly sweet concoction. I love macarons. Possibly my favorite dessert. They are crunchy, look gorgeous, come in a variety of flavors -- what's not to love. Always thought they were hard to make, so when I saw this recipe, and it looked pretty easy to make, without whipping a meringue, piping complicated shapes ..... well, I jumped at the chance to try it. The fact that there was chocolate involved didn't hurt matters either.
Very easy to make. You just throw a bunch of stuff in the food processor. Can I just tell you that when you open the food processor after pulsing everything together, the smell is heavenly -- chocolate and hazelnut is a fantastic combination (as the makers and lovers of Nutella well know). Makes sure you use parchment paper on your cookie sheet. As there is very little fat in these (only what's in the hazelnut) they will stick to the pan like no one's business.
Sunday, March 3, 2013
Creamy Carrot and Millet Soup
2 T Butter
1 medium onion chopped
1 lb carrot peeled and chopped
1/2 c millet
2.5 c reduced sodium chicken stock ( I have homemade vegetable stock on hand at all times, so that's what I used)
1/2 t salt
1 1/4 c milk
1/2 c sour cream or cream fraiche (uhm, yeah, I will use sour cream thank you, as it's a lot cheaper...).
In 3-4 quart pot, melt butter. Add onion, cook for 10 minutes, or until tender. Add the carrots, millet, stock and salt. Bring to boil, reduce heat to low. Cover, and cook for 35 minutes, or until carrots and millet are very tender. Cool slightly. Transfer carrot and millet mixture to food processor. Cover and process until completely smooth, scraping down sides. Add milk and sour cream. Process until completely smooth. Return to pot, and heat gently. Add additional milk to achieve desired texture.
Source: Better Homes and Gardens.
Let's talk millet first. It's a grain -- like quinoa, farro, barley etc. etc. etc. It does not have any gluten.

I found it at Whole Foods in the bulk bins -- $1.99 per pound. Kind of looks like couscous, but it is a grain.
Back to the recipe. I picked it because everything about it sounded different and interesting. Also, the only other time I had carrot soup was in Moscow, Russia. It was the day we finally brought my daughter out of the orphanage. We wanted to go out and celebrate, but it was raining at night, so we just ran down to a little French bakery/coffeeshop/restaurant on our street. Excellent food, and they had carrot soup, which I gobbled down, and so did my daughter. So, I have some fond memories of carrot soup. In fact, here is a picture of us eating carrot soup:

I guess I digressed again, but isn't that the great thing about food, and cooking -- it's all tied into your memories and experiences. OK, back to the recipe.
Definitely very easy to make. The texture of the soup after you cook the millet with the carrots turns into almost a stew. The millet soaks up most of the broth. Pureeing the soup helps, and so does adding the sour cream and milk. The soup is still fairly thick. It has the most beautiful orange color, and a lovely creamy texture. The flavor is sweet and mild. It definitely needs some garnish to punch up the flavor a little bit -- I served it with Hawaiian pink salt, but I think anything crunchy, salty or spicy would be great -- I kept thinking fried prosciutto on top would be fantastic. The recipe says to serve it cheese croutons.


 It's a nice mild soup, the thickness and creaminess comes from the millet, so you use a lot less milk (and no cream) to get a very rich soup. By the way, the millet completely disintegrates after you puree the soup, and there is no taste or textural clue that it's even in the soup.
1 medium onion chopped
1 lb carrot peeled and chopped
1/2 c millet
2.5 c reduced sodium chicken stock ( I have homemade vegetable stock on hand at all times, so that's what I used)
1/2 t salt
1 1/4 c milk
1/2 c sour cream or cream fraiche (uhm, yeah, I will use sour cream thank you, as it's a lot cheaper...).
In 3-4 quart pot, melt butter. Add onion, cook for 10 minutes, or until tender. Add the carrots, millet, stock and salt. Bring to boil, reduce heat to low. Cover, and cook for 35 minutes, or until carrots and millet are very tender. Cool slightly. Transfer carrot and millet mixture to food processor. Cover and process until completely smooth, scraping down sides. Add milk and sour cream. Process until completely smooth. Return to pot, and heat gently. Add additional milk to achieve desired texture.
Source: Better Homes and Gardens.
Let's talk millet first. It's a grain -- like quinoa, farro, barley etc. etc. etc. It does not have any gluten.

I found it at Whole Foods in the bulk bins -- $1.99 per pound. Kind of looks like couscous, but it is a grain.
Back to the recipe. I picked it because everything about it sounded different and interesting. Also, the only other time I had carrot soup was in Moscow, Russia. It was the day we finally brought my daughter out of the orphanage. We wanted to go out and celebrate, but it was raining at night, so we just ran down to a little French bakery/coffeeshop/restaurant on our street. Excellent food, and they had carrot soup, which I gobbled down, and so did my daughter. So, I have some fond memories of carrot soup. In fact, here is a picture of us eating carrot soup:

I guess I digressed again, but isn't that the great thing about food, and cooking -- it's all tied into your memories and experiences. OK, back to the recipe.
Definitely very easy to make. The texture of the soup after you cook the millet with the carrots turns into almost a stew. The millet soaks up most of the broth. Pureeing the soup helps, and so does adding the sour cream and milk. The soup is still fairly thick. It has the most beautiful orange color, and a lovely creamy texture. The flavor is sweet and mild. It definitely needs some garnish to punch up the flavor a little bit -- I served it with Hawaiian pink salt, but I think anything crunchy, salty or spicy would be great -- I kept thinking fried prosciutto on top would be fantastic. The recipe says to serve it cheese croutons.


Subscribe to:
Posts (Atom)